Remember me? At the end of last decade I shared a post on a simple way to run a Kubernetes cluster for local development.
Today I’d like to show the other side of the medal — running your CI environment on Kubernetes (through Github Actions).
It’s simple, mimics your production environment and it’s automated — let’s get to it!
How Github Actions work
If you’ve ever used Travis CI or similar tools you’re already familiar with Actions: they provide you an environment where you can test your applications — generally in the form of a server with your code checked out in a directory. When you push code to your Github repository, an environment is booted, your code gets checked out and you can run tasks on the environment — if any of the tasks fails, your CI task fail.
This is not just useful for running automated tests — you could have builds of your app being compiled in your CI environment and uploaded to S3 or similar services, or send an email to your QA team to let them know what tests are passing / failing.
So yes, you can think of Actions as Github booting a server, checking out your code in there and giving you the option to run any command you want on it — the actual implementation might be fairly different, but this is all the eli5 you need right now.
Like having a server. What now?
If your development environment runs on a k8s cluster, or if you’re planning to run your CI environment in k8s, having a machine to play with everytime you push code to Github is like a manna from heaven: you can simply setup a k8s cluster in there and watch your application run like it would on production.
You might be skeptical about installing k8s in your CI environment for a couple of very valid reasons:
- installing k8s on a server is not always a straightforward operation
- loads of moving parts that need to talk to each other (kubectl, apiserver, etcd, kubelet and so on), so it could require quite some time to get everything up & running
Given that a CI environment should ideally be up in seconds, the task of booting up a k8s cluster there seems quite daunting.
Luckily, the folks at Rancher got us covered: they developed k3s, a lightweight Kubernetes distribution geared towards IoT & edge computing — with the main selling point being the fact that the cluster is up & running in a few seconds with a simple:
1 2 3 4 | |
With k3s, bringing k8s into our Action is extremely simple — let’s see it in action!
The Kubernetes Github Action
First off, create your action file, eg. test.yml under the folder
.github/workflows in your repo — then add the following steps
to the workflow:
1 2 3 4 5 6 7 8 9 10 11 12 13 14 15 16 17 18 19 | |
As you can see, all the magic happens here:
1 2 3 4 | |
We download k3s, install it and copy its configuration into
the usual kubeconfig path. This is done so that kubectl
can talk to the cluster, else you have to use the one provided
by k3s under the alias k3s kubectl (meaning you need to run
commands such as k3s kubectl get po).
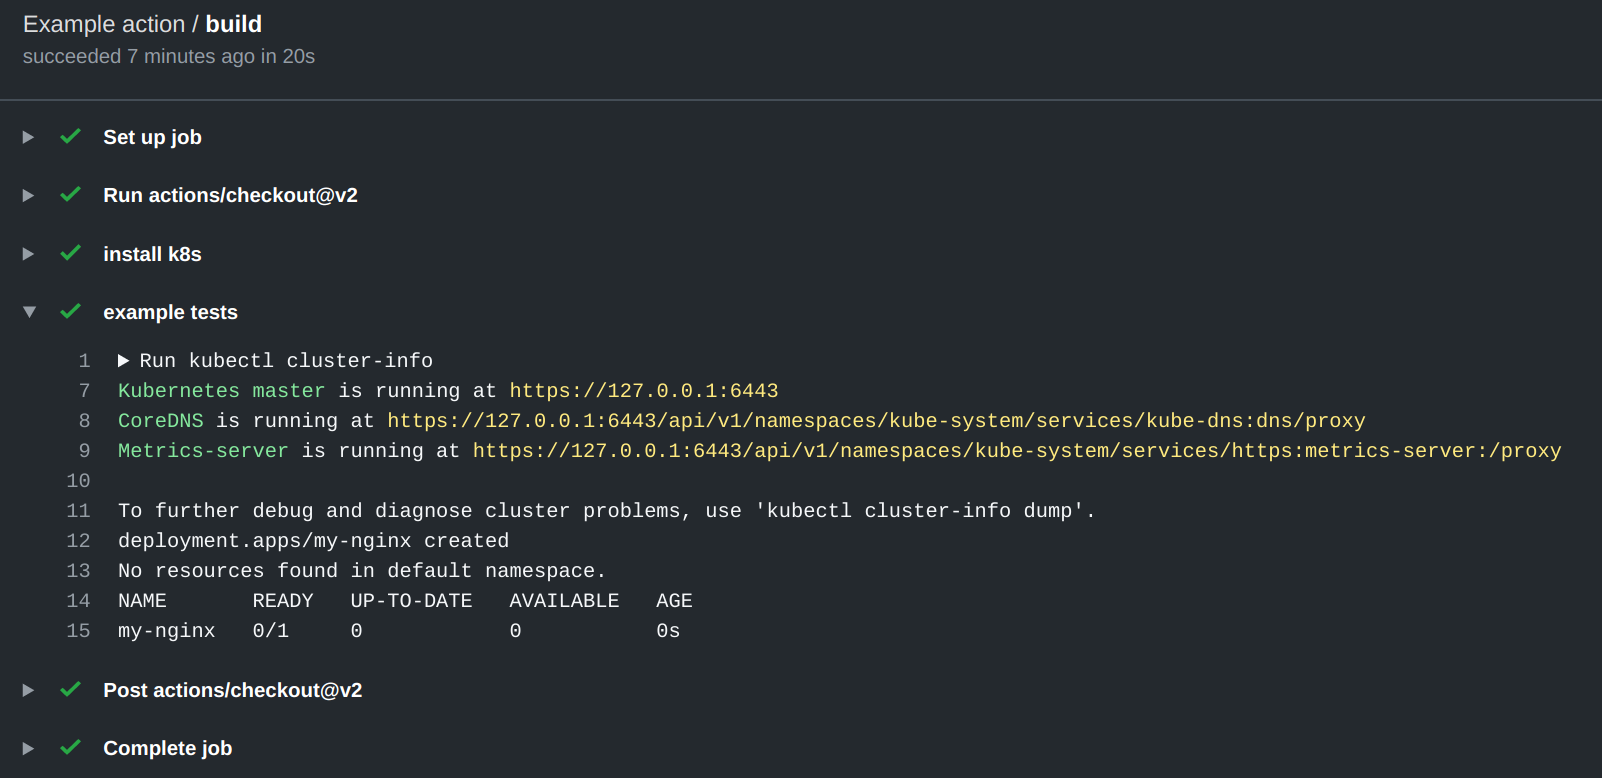
If you’re wondering how does this look like in action, you should probably head over to the sample repo I setup at github.com/odino/k8s-github-action: it’s really not that crazy, as it simply contains the above code. What you might find interesting, though, is having a look at some of the “builds” that ran, where you can clarly see k8s up & running:
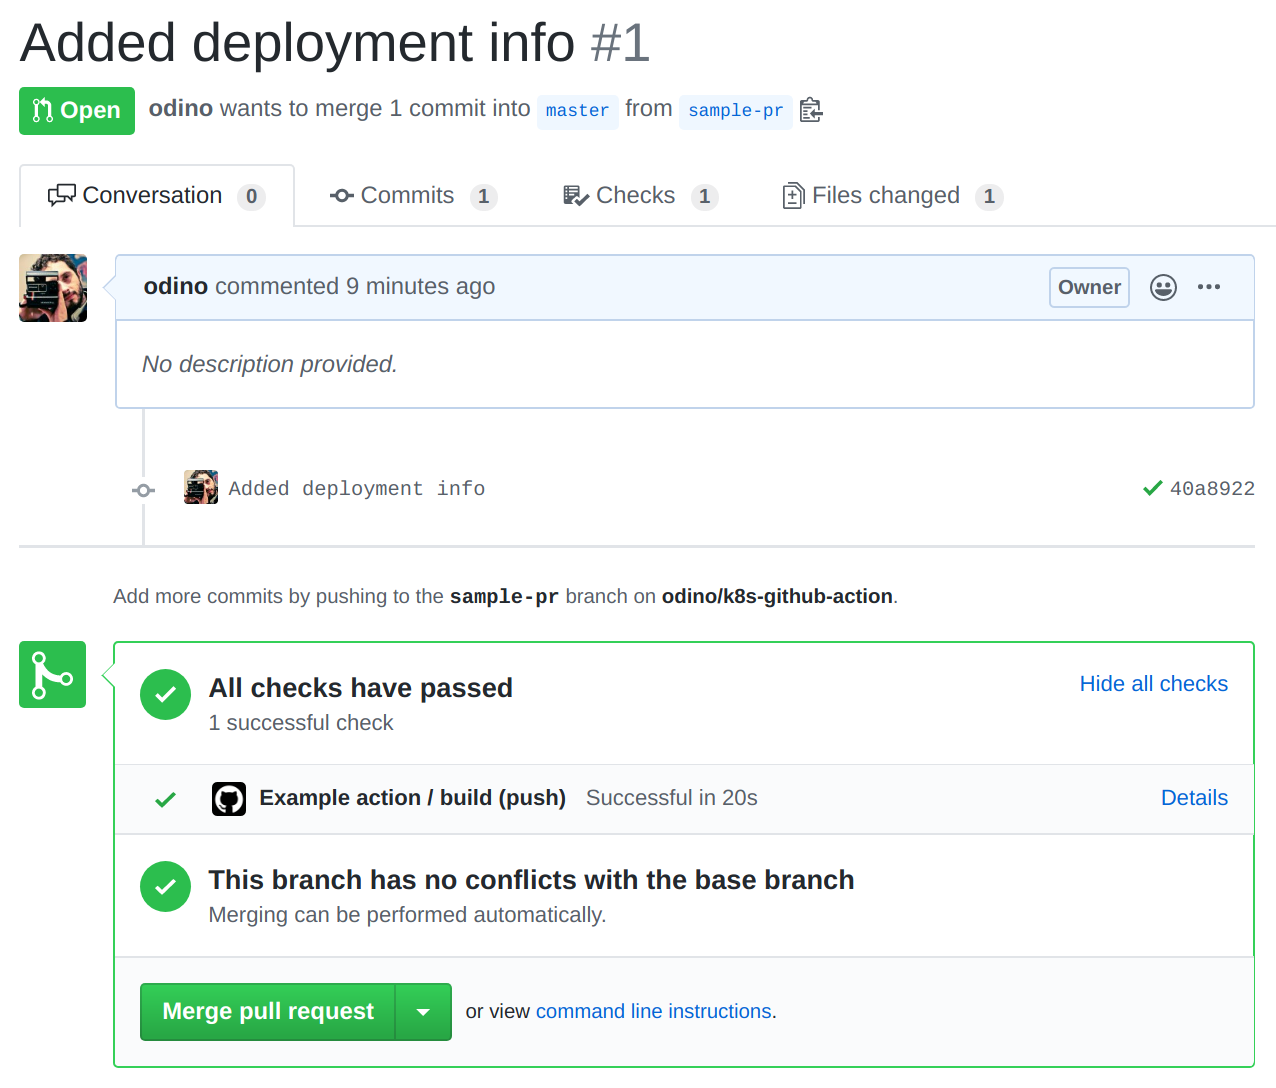
As usual, Actions report their status on PRs, so you get Github to confirm that everything ran smoothly whenever you push:
Hope this was helpful — peace!