- Web security demystified: WASEC
- Introduction
- Understanding the browser
- Security at the HTTP level
- HTTP headers to secure your application
- Hardening HTTP cookies
- Situationals
This post is part of the ”WASEC: Web Application SECurity” series, which is a portion of the content of WASEC, an e-book on web application security I’ve written.
Here is a list of all the articles in this series:
If you’ve enjoyed the content of this article, consider buying the complete ebook on either the Kindle store or Leanpub.
As we’ve seen, servers can send HTTP headers to provide the client additional metadata around the response: beside sending the content that the client requested, clients are then allowed to specify how a particular resource should be read, cached or secured.
There’s currently a very large spectrum of security-related headers that we should understand, as they have been implemented by browsers in order to make it harder for attackers to take advantage of vulnerabilities: the next paragraphs try to summarize each and every one of them by explaining how they’re used, what kind of attacks they prevent and a bit of history behind each header.
HSTS
Since late 2012, HTTPS-everywhere believers have found it easier to force a client
to always use the secure version of the HTTP protocol, thanks to the HTTP Strict
Transport Security: a very simple Strict-Transport-Security: max-age=3600 will
tell the browser that for the next hour (3600 seconds) it should not interact with
the applications with insecure protocols.
When a user tries to access an application secured by HSTS through HTTP, the browser
will simply refuse to go ahead, automatically converting http:// URLs to https://.
You can test this locally with the code at github.com/odino/wasec/tree/master/hsts.
You will need to follow the instructions in the README (they involve installing a trusted SSL
certificate for localhost on your machine, through the amazing mkcert tool)
and then try opening https://localhost:7889: there are 2 servers in this example,
an HTTPS one listening on 7889, and an HTTP one on port 7888. When you access
the HTTPS server, it will always try to redirect you to the HTTP version, which will work since there is no HSTS policy on the HTTPS server.
If you instead add the hsts=on parameter in your URL, the browser will forcefully
convert the link in the redirect to its https:// version. Since the server at 7888
is http-only, you will end staring at a page that looks more or less like this:

You might be wondering what happens the first time a user visits your website, as
there is no HSTS policy defined beforehand: attackers could potentially trick
the user to the http:// version of your website and perpetrate their attack there,
so there’s still room for problems. That’s a valid concern, as HSTS is a
trust on first use mechanism: what it tries to do is to make sure that,
once you’ve visited a website, the browser knows that subsequent interaction must
use HTTPS.
A way around this shortcoming would be to maintain a huge database of websites that enforce HSTS, something that Chrome does through hstspreload.org: you must first set your policy, then visit the website and check whether it’s eligible to be added to the database. For example, we can see Facebook made the list:

By submitting your website on this list, you can tell browsers in advance that your site uses HSTS, so that even the first interaction between clients and your server will be over a secure channel — but this comes at a cost: you really need to commit to HSTS. If, by any chance, you’d like your website to be removed from the list that’s no easy task for browser vendors:
Be aware that inclusion in the preload list cannot easily be undone.
Domains can be removed, but it takes months for a change to reach users with a Chrome update and we cannot make guarantees about other browsers. Don’t request inclusion unless you’re sure that you can support HTTPS for your entire site and all its subdomains the long term.
This happens because the vendor cannot guarantee that all users will be on the latest version of their browser, with your site removed from the list. Think carefully, and make a decision based on your degree of confidence in HSTS and your ability to support it on the long run.
HPKP
HTTP Public Key Pinning (abbr. HPKP) is a mechanism that allows us to advertise to the browser which SSL certificates to expect whenever it connects to our servers: it is a trust on first use header, just like HSTS, meaning that, once the client connects to our server, it will store the certificate’s info for subsequent interactions. If, at any point in time, the client detects that another certificate is being used by the server, it will politely refuse to connect, rendering man in the middle (MITM) attacks very hard to pull off.
This is how a HPKP policy looks like:
1 2 3 4 5 | |
The header advertises what certificates the server will use (in this case it’s two of them)
using a hash of the certificates, and includes additional information such as
the time-to-live of this directive (max-age=3600), and a few other details. Sadly,
there’s no point in digging deeper to understand what we can do with public key pinning,
as this feature is being deprecated by Chrome — a signal that its adoption is
destined to plummet very soon.
Chrome’s decision is not irrational, but simply a consequence of the risks
associated with public key pinning: if you lose your certificate, or simply make a mistake
while testing, your website is gone (for the duration of the max-age directive,
which is typically weeks or months). As a result of these potentially catastrophic
consequences, adoption of HPKP has been extremely low, and there have been incidents
where big-time websites have been unavailable because of a misconfiguration. All considered,
Chrome decided users were better off without the protection offered by HPKP — and
security researchers aren’t entirely against this decision.
Expect-CT
While HPKP has been deprecated, a new header stepped in to prevent fraudulent
SSL certificates from being served to clients: Expect-CT.
The goal of this header is to inform the browser that it should perform additional
“background checks” to ensure the certificate is genuine: when a server uses
the Expect-CT header, it is fundamentally requesting the client to verify that
the certificates being used are present in public Certificate Transparency (CT)
logs.
The Certificate Transparency initiative is an effort led by Google in order to:
[provide] an open framework for monitoring and auditing SSL certificates in nearly real time.
Specifically, Certificate Transparency makes it possible to detect SSL certificates that have been mistakenly issued by a certificate authority or maliciously acquired from an otherwise unimpeachable certificate authority. It also makes it possible to identify certificate authorities that have gone rogue and are maliciously issuing certificates.
The header takes this form:
1
| |
In this example, the server is asking the browser to:
- enable CT verification for the current app for a period of 1 hour (3600 seconds)
enforcethis policy and prevent access to the app if a violation occurs- send a report to the given URL if a violation occurs
The Certificate Transparency initiative’s goal is to detect misissued or malicious
certificates (and rogue Certificate Authorities) earlier, faster, and more precisely
than any other method used before. By opting-in using the Expect-CT header,
you can take advantage of this initiative to improve your app’s security posture.
X-Frame-Options
Imagine seeing a web page such as this popping in front of your screen:

As soon as you click on the link, you realize that all the money in your bank account is gone. What happened?
You were a victim of a clickjacking attack: an attacker directed you to their
website, which displays a very attractive link to click. Unfortunately, he also
embedded in the page an iframe from your-bank.com/transfer?amount=-1&[email protected]
but hid it by setting it’s opacity to 0%: what then happened is that thought of
clicking on the original page, trying to win a brand-new hummer, but instead the
browser captured a click on the iframe — a dangerous click that confirmed the transfer
of money. Most banking systems require you to specify a one-time PIN code to confirm
transactions, but your bank didn’t catch up with times and all of your money is gone.
The example is pretty extreme but should let you understand what could be the consequences of a clickjacking attack: the user intends to click on a particular link, while the browser will trigger a click on the “invisible” page that’s been embedded as an iframe.
I have included an example of this vulnerability at github.com/odino/wasec/tree/master/clickjacking.
If you run the example and try clicking on the “appealing” link, you will see the
actual click is intercepted by the iframe, which increases its opacity so that’s
easier for you to spot the problem. The example should be accessible at
http://localhost:7888:

Luckily, browsers have come up with a simple solution to the problem: X-Frame-Options
(abbr. XFO) lets you decide whether your app
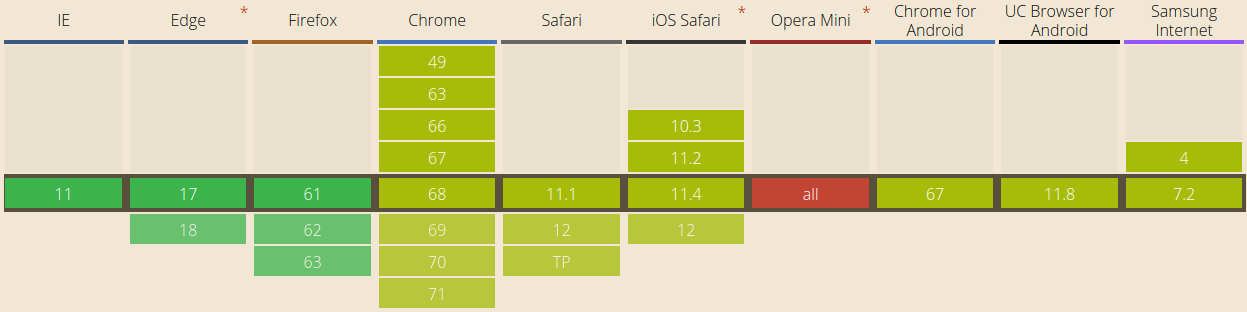
can be embedded as an iframe on external websites. Popularized by Internet Explorer
8, XFO was first introduced in 2009 and is still supported by all major browsers:
when a browser sees an iframe, it loads it and verifies that its XFO allows its inclusion
in the current page before rendering it.
The supported values are:
DENY: this web page cannot be embedded anywhere. This is the highest level of protection as it doesn’t allow anyone to embed our contentSAMEORIGIN: only pages from the same domain as the current one can embed this page. This means thatexample.com/embeddercan loadexample.com/embeddedso long as its policy is set toSAMEORIGIN. This is a more relaxed policy that allows owners of a particular website to embed their own pages across their applicationALLOW-FROM uri: embedding is allowed from the specified URI. We could, for example, let an external, authorized website embed our content by usingALLOW-FROM https://external.com. This is generally used when you intend to allow a 3rd party to embed your content through an iframe
An example HTTP response that includes the strictest XFO policy possible looks like:
1 2 3 4 5 | |
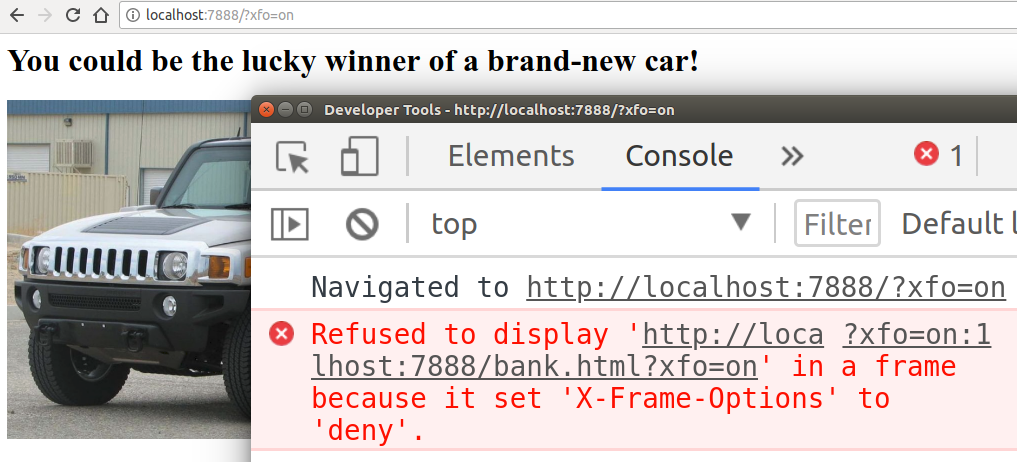
In order to showcase how browsers behave when XFO is enabled, we can simply change
the URL of our example to http://localhost:7888/?xfo=on. The xfo=on parameter
tells the server to include X-Frame-Options: deny in the response, and we can
see how the browser restricts access to the iframe:
XFO has been considered the best way to prevent frame-based clickjacking attacks until another header came into play years later: the Content Security Policy.
Content-Security-Policy
The Content-Security-Policy header, often abbreviated to CSP, provides a next-generation
utility belt for preventing a plethora of attacks, ranging from XSS (cross-site scripting)
to clickjacking.
To understand how CSP helps us, we should first think of an attack vector: let’s say we just built our own Google Search, a simple input text with a submit button.
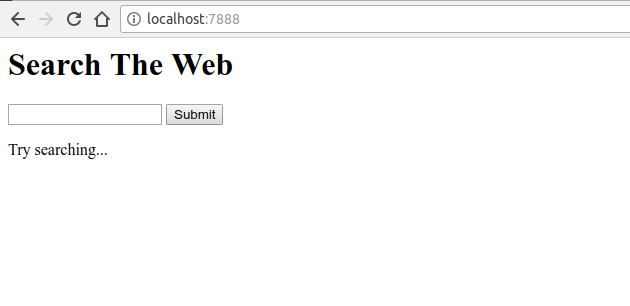
This web application does nothing magical: displays a form, lets the user execute a search and displays the search results alongside with the keyword the user searched for. When we execute a simple search, this is what the application returns:

Amazing: our application incredibly understood our search and found a related image. If we dig deeper in the source code, available at github.com/odino/wasec/tree/master/xss, we will soon realize that the application presents a security issue, as whatever keyword the user searches for is directly printed in the HTML served to the client:
1 2 3 4 5 6 7 8 9 10 11 | |
1 2 3 4 5 6 7 8 9 10 11 12 | |
This presents a nasty consequence: an attacker can craft a specific link that executed arbitrary JavaScript on the victim’s browser!

If you have the time and patience to run the example locally, you will be able to quickly understand the power of CSP. I’ve added a query string parameter that turns CSP on, so we can try navigating to a malicious URL with CSP turned on:
1
| |
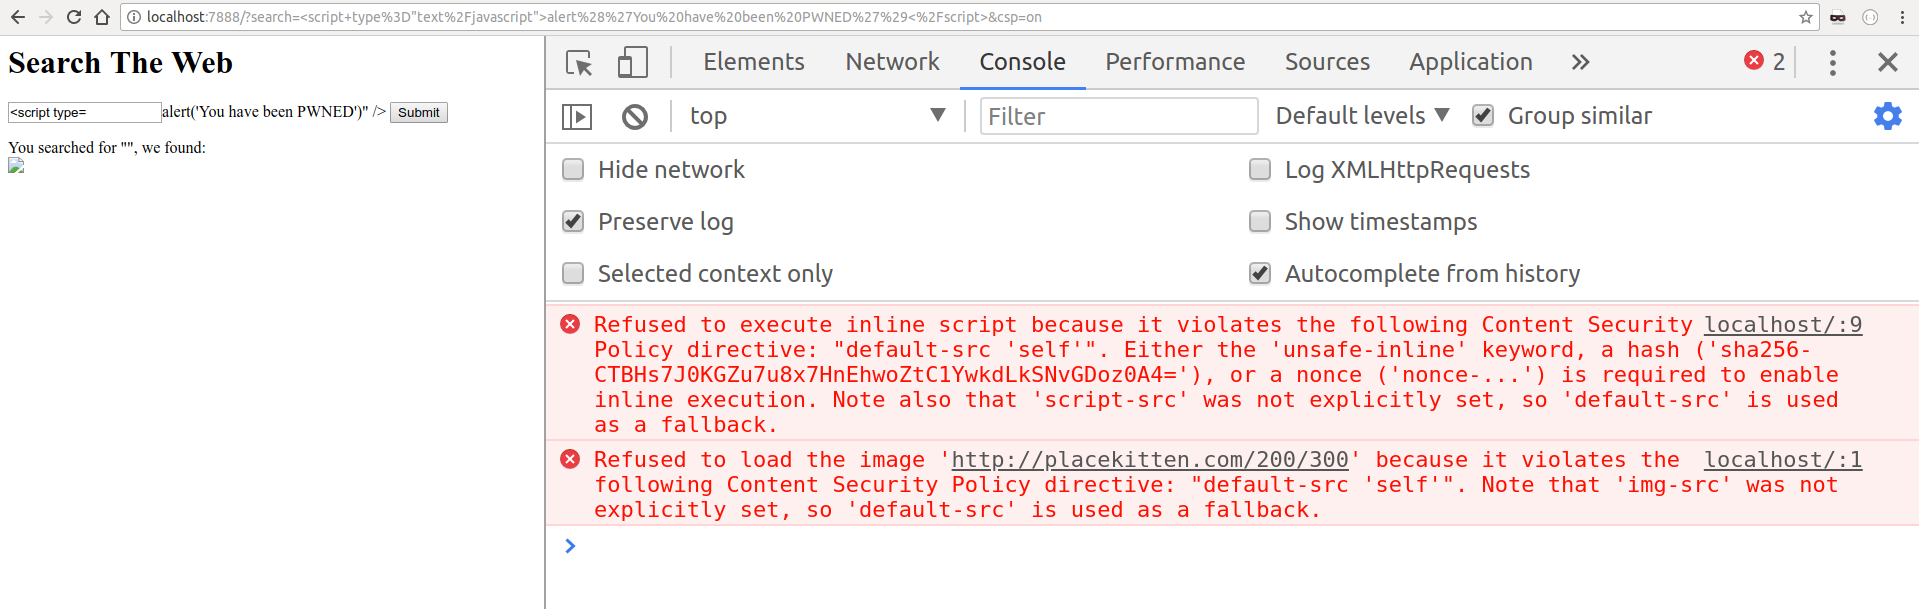
As you see in the example above, we have told the browser that our CSP policy only allows scripts included from the same origin of the current URL, which we can easily verify by curling the URL:
1 2 3 4 5 6 7 | |
Since the XSS attack would be perpetrated through an inline script (a script directly embedded in the HTML content), the browser politely refused to execute it, keeping our user safe. Imagine if, instead of simply displaying an alert dialog, the attacker would have set up a redirect to its own domain, through some JavaScript code that could look like:
1
| |
They would have been able to steal all of the user’s cookies, which might contain highly sensitive data (more on this in the next article).
By now, it should be clear how CSP helps us prevent a range of attacks on web applications: you define a policy and the browser will strictly adhere to it, refusing to run resources that would violate the policy.
An interesting variation of CSP is the report-only mode: instead of using the
Content-Security-Policy header, you can first test the impact of CSP on your
website by telling the browser to simply report errors, without blocking script
execution and so on, by using the Content-Security-Policy-Report-Only header.
Reporting will allow you to understand what breaking changes the CSP policy you’d like to roll out might cause, and fix them accordingly — we can even specify a report URL and the browser will send us a report. Here’s a full example of a report-only policy:
1
| |
CSP policies can be a bit complex on their own, such as in the following example:
1
| |
This policy defines the following rules:
- executable scripts (eg. JavaScript) can only be loaded from
scripts.example.com - images may be loaded from any origin (
img-src: *) - video or audio content can be loaded from two origins:
medias.example.comandmedias.legacy.example.com
As you can see, policies can become lengthy, and if we want to ensure the highest protection for our users this can become quite of a tedious process; nevertheless, writing a comprehensive CSP policy is an important step towards adding an additional layer of security to our web applications.
For more information around CSP I would recommend a deep dive at developer.mozilla.org/en-US/docs/Web/HTTP/CSP.
X-XSS-Protection
Although superseded by CSP, the X-XSS-Protection header provides a similar type
of protection: unsupported by Firefox, this header is used to
mitigate XSS attacks in older browsers that don’t fully support CSP.
Its syntax is very similar to what we’ve just seen:
1
| |
Reflected XSS is the most common type of attack, where an unsanitized input gets
printed by the server without any validation, and it’s where this header truly
shines. If you want to see this yourself, I would recommend to try out the example
at github.com/odino/wasec/tree/master/xss
as, by appending xss=on to the URL, it shows what a browser does when XSS protection
is turned on. If we enter a malicious string in our search box, such as
<script>alert('hello')</script>, the browser will politely refuse to execute the
script, and explain the reasoning behind its decision:
1 2 3 4 | |
Even more interesting is Chrome’s default behavior when the webpage does not specify
any CSP or XSS policy, a scenario we can test by adding the xss=off parameter
to our URL (http://localhost:7888/?search=%3Cscript%3Ealert%28%27hello%27%29%3C%2Fscript%3E&xss=off):

Amazing, Chrome’s cautious enough that it will prevent the page from rendering, making reflected XSS very difficult to pull off — it’s impressive to see how far browsers have come.
Feature policy
In July 2018, security researches Scott Helme published a very interesting blog
post detailing a new security header in the making: Feature-Policy.
Currently supported by very few browsers (Chrome and Safari at the time of writing), this header lets us define whether a specific browser feature is enabled within the current page: with a syntax very similar to CSP, we should have no issue understanding what a feature policy such as the following one means:
1
| |
If we still have a few doubts about how this policy impacts the browser APIs available to the page, we can simply dissect it:
vibrate 'self': this will allow the current page to use the vibration API and any nested browsing contexts (iframes) on the same originpush *: the current page and any iframe can use the push notification APIcamera 'none': access to the camera API is denied to the current page and any nested context (iframes)
The feature policy might have a short history, but it doesn’t hurt to get a head start: if your website allows users to, for example, take a selfie or record audio, it would be quite beneficial to use a policy that restricts other contexts from accessing the API through your page.
X-Content-Type-Options
Sometimes, clever browser features end up hurting us from a security standpoint: a clear example is MIME-sniffing, a technique popularized by Internet Explorer.
MIME-sniffing is the ability, for a browser, to auto-detect (and fix) the content type of
a resource it is downloading: say that, for example, we ask the browser to render
an image at /awesome-picture.png, but the server sets the wrong
type when serving it to the browser (ie. Content-Type: text/plain) — this would
generally result in the browser not being able to display the image properly.
In order to fix the issue, IE went to great lengths to implement a MIME-sniffing
capability: when downloading a resource, the browser would “scan” it and, if it
would detect that the resource’s content type is not the one advertised by the
server in the Content-Type header, it would ignore the type sent by the server
and interpret the resource according to the type detected by the browser.
Now, imagine hosting a website that allows users to upload their own images, and
imagine a user uploading a /test.jpg file that contains JavaScript code. See
where this is going? Once the file is uploaded, the site would include it in its own
HTML and, when the browser would try to render the document, it would find the “image” the user
just uploaded. As the browser downloads the image, it would detect that it’s a script
instead, and execute it on the victim’s browser.
To avoid this issue, we can set the X-Content-Type-Options: nosniff header that
completely disables MIME-sniffing: by doing so, we are telling the browser that
we’re fully aware that some file might have a mismatch in terms of type and content,
and the browser should not worry about it — we know what we’re doing, so the browser
shouldn’t try to guess things, potentially posing a security threat to our users.
CORS
On the browser, through JavaScript, HTTP requests can only be triggered across the
same origin: simply put, an AJAX request from example.com can only connect to
example.com.
This is because your browser contains useful information for an attacker: cookies,
which are generally used to keep track of the user’s session. Imagine if an attacker
would set up a malicious page at win-a-hummer.com that immediately triggers an
AJAX request to your-bank.com: if you’re logged in on the bank’s website, the
attacker would then be able to execute HTTP requests with your credentials, potentially
stealing information or, worse, wiping your bank account out.
There might be some cases, though, that require you to execute cross-origin AJAX requests, and that is the reason browsers implement Cross Origin Resource Sharing (abbr. CORS), a set of directives that allow you to execute cross-domain requests.
The mechanics behind CORS are quite complex, and it won’t be practical for us to
go over the whole specification, so I am going to focus on a “stripped down” version
of CORS: all you need to know, for now, is that by using the Access-Control-Allow-Origin
header, your application tells the browser that it’s ok to receive requests from
other origins.
The most relaxed form of this header is Access-Control-Allow-Origin: *, which
allows any origin to access our application, but we can restrict it by simply
adding the URL we want to whitelist with Access-Control-Allow-Origin: https://example.com.
If we take a look at the example at github.com/odino/wasec/tree/master/cors
we can clearly see how the browser prevents access to a resource on a separate origin:
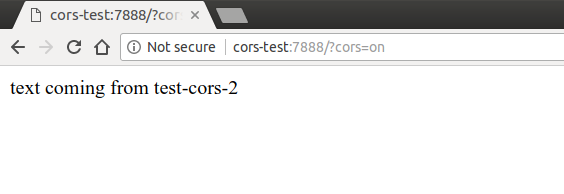
I have set up the example to make an AJAX request from test-cors to test-cors-2,
and print the result of the operation to the browser. When the server behind test-cors-2
is instructed to use CORS, the page works as you would expect — try navigating to
http://cors-test:7888/?cors=on:
But when we remove the cors parameter from the URL, the browser intervenes and
prevents us from accessing the content of the response:

An important aspect we need to understand is that the browser executed the request,
but prevented the client from accessing it: this is extremely important, as it still
leaves us vulnerable if our request would have triggered any side effect on the server
— imagine, for example, if our bank would allow to transfer money by simply
calling the url my-bank.com/transfer?amount=1000&from=me&to=attacker, that would
be a disaster!
As we’ve seen at the beginning of this article, GET requests are supposed to be
idempotent, but what would happen if we tried triggering a POST request? Luckily,
I’ve included this scenario in the example, so we can try it by navigating to
http://cors-test:7888/?method=POST:
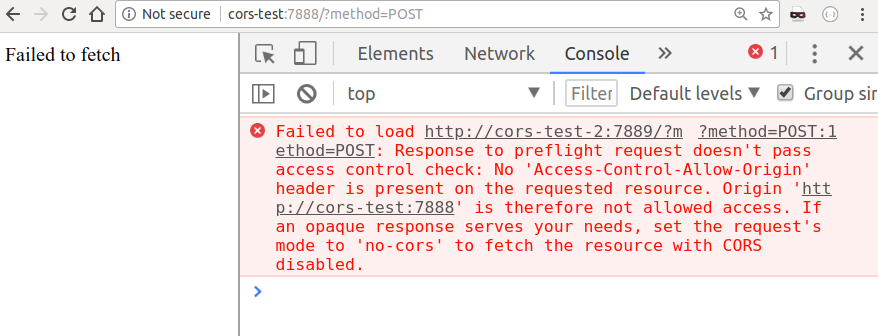
Instead of directly executing our POST request, which could potentially cause
some serious trouble on the server, the browser sent a “preflight” request:
this is nothing but an OPTIONS request to the server, asking it to validate
whether our origin is allowed. In this case, the server did not respond positively,
so the browser stops the process, and our POST request never reaches the target.
This tells us a couple things:
- CORS is not a simple specification: there are quite a few scenarios to keep in mind and you can easily get tangled in the nuances of features such as preflight requests
- never expose APIs that change state via
GET: an attacker can trigger those requests without a preflight request, meaning there’s no protection at all
Out of experience, I found myself more comfortable with setting up proxies that
can forward the request to the right server, all on the backend, rather than using CORS. This means that
your application running at example.com can setup a proxy at example.com/_proxy/other.com,
so that all requests falling under _proxy/other.com/* get proxied to other.com.
I will conclude my overview of this feature here but, if you’re interested in understanding CORS in depth, MDN has a very lengthy article that brilliantly covers the whole specification at developer.mozilla.org/en-US/docs/Web/HTTP/CORS.
X-Permitted-Cross-Domain-Policies
Very much related to CORS, the X-Permitted-Cross-Domain-Policies targets cross-domain
policies for Adobe products (namely Flash and Acrobat).
I won’t go much into the details, as this is a header that targets very specific
use cases: long story short, Adobe products handle cross-domain request through
a crossdomain.xml file in the root of the domain the request is targeting, and
the X-Permitted-Cross-Domain-Policies defines policies to access this file.
Sounds complicated? I would simply suggest to add an
X-Permitted-Cross-Domain-Policies: none and ignore clients wanting to make cross-domain
requests with Flash.
Referrer-Policy
At the beginning of our careers, we all probably made the same mistake: use the Referer
header to implement a security restriction on our website. If the header contains
a specific URL in a whitelist we define, we’re going to let users through.
Ok, maybe that wasn’t every one of us — but I damn sure made this mistake back then:
trusting the Referer header to give us reliable information on the origin the user
comes from. The header was really useful until we figured that sending
this information to sites could pose a potential threat to our users’ privacy.
Born at the beginning of 2017 and currently supported by all major browsers, the
Referrer-Policy header can be used to mitigate these privacy concerns by telling
the browser that it should only mask the URL in the Referer header, or omit it
altogether.
Some of the most common values the Referrer-Policy can take are:
no-referrer: theRefererheader will be entirely omittedorigin: turnshttps://example.com/private-pagetohttps://example.com/same-origin: send theRefererto same-site origins but omit it for anyone else
It’s worth to note that there are a lot more variations of the Referrer-Policy
(strict-origin, no-referrer-when-downgrade, etc) but the ones I mentioned above
are probably going to cover most of your use cases. If you wish to better understand
each and every variation you can use, I would recommend heading to the
OWASP dedicated page.
The Origin header is very similar to the Referer, as it’s sent by the browser
in cross-domain requests to make sure the caller is allowed to access a resource
on a different domain. The Origin header is controlled by the browser, so there’s no
way malicious users can tamper with it. You might be tempted to use it as a
firewall for your web application: if the Origin is in our whitelist,
let the request go through.
One thing to consider, though, is that other HTTP clients such as cURL can present
their own origin: a simple curl -H "Origin: example.com" api.example.com will
render all origin-based firewall rules inefficient… …and that is why you
cannot rely on the Origin (or the Referer, as we’ve just seen) to build
a firewall to keep malicious clients away.
Testing your security posture
I want to conclude this article with a reference to securityheaders.com, an incredibly useful website that allows you to verify that your web application has the right security-related headers in place — after you submit a URL, you will be handed a grade and a breakdown, header by header. Here’s an example report for facebook.com:
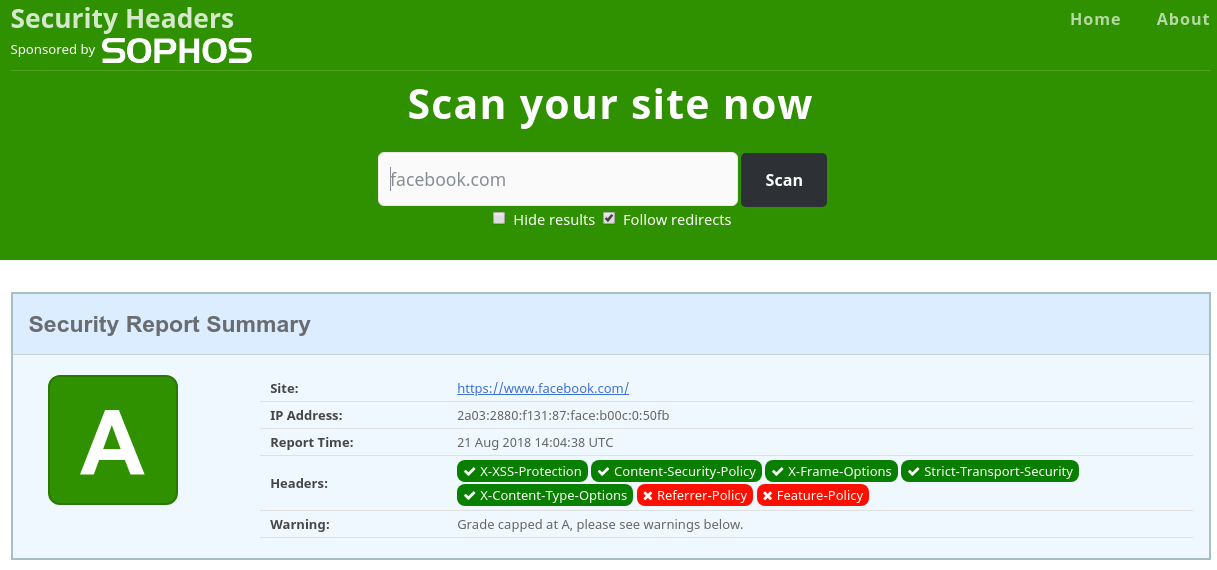
If in doubt on where to start, securityheaders.com is a great place to get a first assessment.
Stateful HTTP: managing sessions with cookies
This article should have introduced us to a few interesting HTTP headers, allowing us to understand how they harden our web applications through protocol-specific features, together with a bit of help from mainstream browsers.
In the next post, we will delve deep into one of the most misunderstood features of the HTTP protocol: cookies.
Born to bring some sort of state to the otherwise stateless HTTP, cookies have probably been used (and misused) by each and everyone of us in order to support sessions in our web apps: whenever there’s some state we’d like to persist it’s always easy to say “store it in a cookie”. As we will see, cookies are not always the safest of vaults and must be treated carefully when dealing with sensitive information.